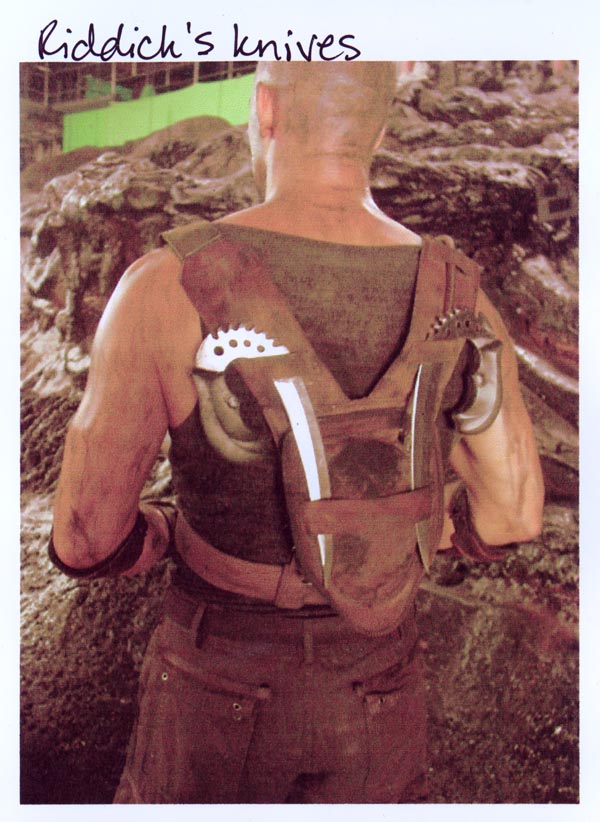
Riddick Swingblade's - By Boba Debt
SHAPING THE HANDLE
This part is easier to modify then I expected, you do not have to remove
a lot of material but it is tempered so it will be hard on your tools.
Originally I thought annealing the blade would make this easier but since the
work is minimal there is no need to do this, annealing is the process of making
tempered steal mild through a heating process.
I used a 6" pedestal grinder and a 30" x1" Bench Top Sander, however I am sure
you could use hand files or a Dremel with the appropriate cutting tools.
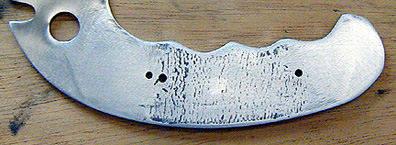
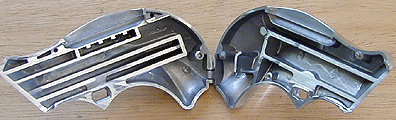
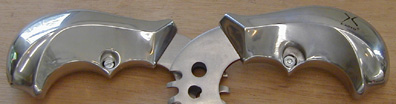
This is what it will look after the removal of the wood handles
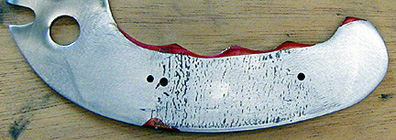
The red areas are the material that has to be removed
This is how it should look when you are done:
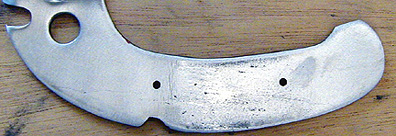
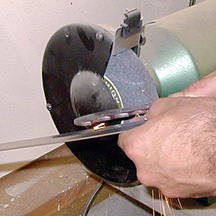
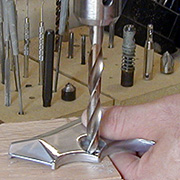
I use a pedestal grinder with a course wheel to make the notch on the outside
of the handle
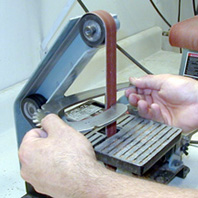
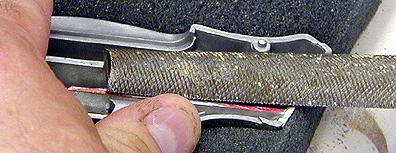
I use a 30" x 1" Bench Top Sander with and 80 grit sanding belt to remove
the material on the inside of the handle:
The whole process took about 30 minutes and destroyed one brand new sanding belt.
I supported the blade with my hand instead of resting it on the tool tables to prevent scratching.
MODIFYING THE ERGO
This part is easy to modify but it takes more time even though the metal is quite soft.
I used a standard hand file for all of the work.
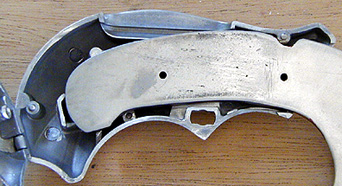
This is what an Ergo looks like opened up, it is hinged in the back.
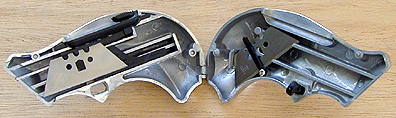
I have removed the internal parts and used a red marker to show the areas that need to be modified.
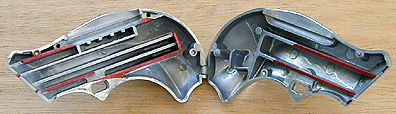
This is how it should look when you are done:
I use a hand file to reduce the height of the red areas and to widen the opening of handle.
It is hard to tell in pictures but the horizontal raised areas are not parallel to the
centerline of the knife, they are tapered, so you have to not only make them lower, but you
also have to make them parallel.
This is not a difficult step but it does take about an hour, you want to work slowly removing
just enough material to allow the handle to close on the blade.
This is how it should look when you are done, as you can see the notch in the blade clears
the alignment pin and the end of the blade hits the back raised area of the handle
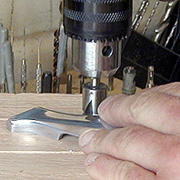
To hold the handle in the closed position I use a #6 countersunk bolt and nut. To keep them
from sticking out too far I use a counter sink on one side of the handle and a flat bottomed
drill bit to counterbore the other side of the handle
Once you set the blade handle in place and bolt the Ergo handle shut you will have a rock solid
knife that feels as if it were professionally made.
FINISHING THE HANDLE
I use Devcon Steel Epoxy to fill all of the voids on the handle. The epoxy cures in about 6 hours so you must do this in 3-4 steps.
I start with the Bolt Head side first. I apply just enough epoxy to over fill the void and then I let it set up for 15-30 minutes.
Once it is partially set, I wet my finger with water and use it to smooth the epoxy and blend the flat areas into the sides of the Ergo creating a smooth radius.
Because this is a very thin and small application of epoxy you can start to work then Nut side in about 2 hours. Once both sides are
done I do the top slot, this may take 2 applications of epoxy and it is best to let it set for 24 hours.
I also fill the seam around the handle and the hinge pin area.
Once the last application of epoxy has cured for 24 hours I lightly sand the seams and the top slot, the areas covering the Bolt Head
and nut should need very little work but if you have to sand use worn out sand paper to avoid rub through.
After everything it sanded smooth I tape up the blade apply a coat of primer followed by a coat of Krylon Ultra Flat Black followed with Stain Top Coat.
Once the top coat has cured for 48 hours I use worn out 220 grit sand paper to remove the paint from the raised edges to reveal the silver metal.
Then I use my hands to "rub' the finish until it looks smooth and aged, I do this because the satin top coat gives the handle a crisp look that I don't like.