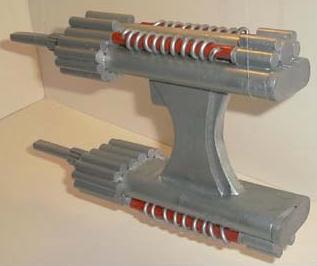
Build your own Sentry Blaster
|
6" piece of 0.5" pine board (had this left over from Taekwondo Belt test) |
Maybe about $1.00 |
|
2 1/8th" pieces of sheet wood (the pieces I used were door hangers like you see at hotels that say "Maid Service" or "Do not disturb". They are unfinished) |
Micheal Lewards - $2.00 |
|
1 sheet of 0.25" X 2.5" X 24" wood from home depot (used for endcaps, the piece is about 36" long, but I ended up using only a length of about 3" of it) |
Home Depot - $0.75 |
|
1/4" threaded rod (about 20" piece) |
Home Depot - $1.00 |
|
Bondo |
Wal-Mart - used about $1.00 worth |
|
16 gage wire |
Home Depot or local HW store - $1.00 |
|
Assorted nuts, bolts and screws |
N/A |
|
Dowels: |
Home Depot - about $5.00 |
|
Gray primer and Rustoleum Silver metallic spray paint |
Home Depot |
|
|
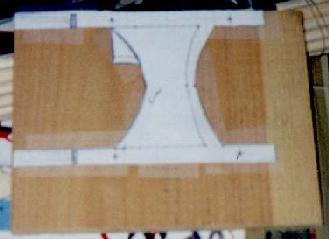
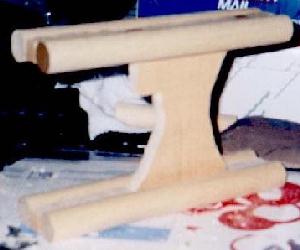
Use this template
to cut out main body and grips. I used a jewelers saw to cut out main body and the dremel to cut the grips. |
|
No pic for this step. |
NOTE: I cut all dowels with the hacksaw. This gave me very straight and smooth ended cuts. |
|
|
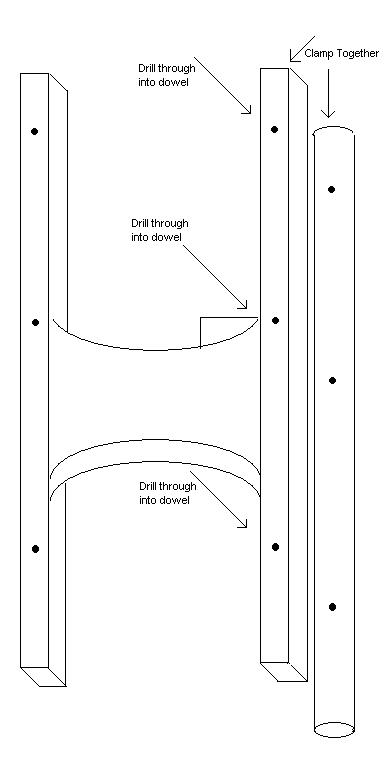
Line up one tube against body and clamp it onto the main body. Use the main body holes
as a guide to drill holes into the dowel (these holes will hold the threaded rod). Make sure that the
hole is deep enough to accept the length of threaded rod you cut in the next step. |
|
|
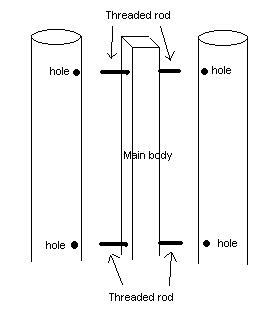
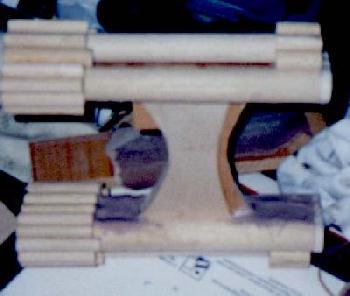
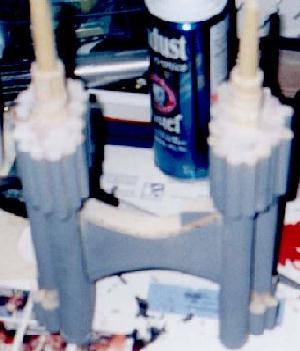
Cut 3 sections of threaded rod at about 1 to 1.5" long. Place rods
through body. Take one dowel and slide it onto the rods. Take the second dowel and
do same for other side. Squeeze dowels toward the body. Its a bit tight, but will come
together and hold well. It you didn't make the holes in the dowels long enough, you
are going to have to removed one side, cut the rod with the dremel and try again.
|
|
|
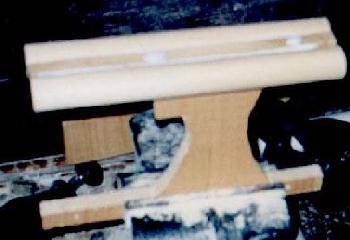
Run a line of elmers glue in the space between the dowel and the body on top and on
bottom. Let set. |
|
|
Repeat that process for the bottom of the blaster as well. Glue and let set.
|
|
|
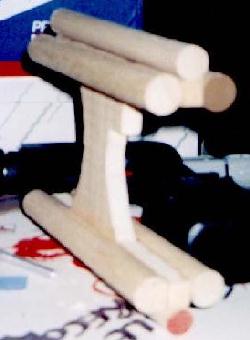
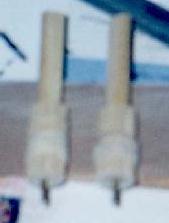
Cut two(2) 3/4" dowels into 7-7/8th" lengths. These are the top and bottom rods.
Drill two very small hole sinto theese dowels. I took finish nails and glued them into these holes with
the point facing out. Pressed the rod onto the main body. The nails should slide into the pine board very
easily and stay snug. Glue and let dry.
|
|
No pic available |
Attach the grips to the main body. You have to slide these into place from the front of the gun. They will be very tight. I had to sand down the tops and bottoms of the grips to be able to slide them into place. Once you can do that, slide them out, put some elmers glue in between where the grips and the body touch and slide the grips back into place. Clamp and let dry. Do not worry if they are a but off, you can file sand the grips smooth before painting. |
|
No pic available |
Cut most of the 3/8" dowels into 2" lengths. You will also want four 2-1/8" lengths. |
|
|
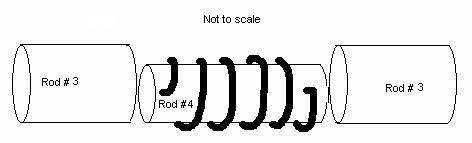
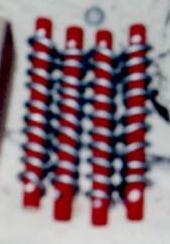
The power rods: I used a rod that was 1 size smaller than the rods it connect to at the front and back. It will be the same height with the wire wrapped around it. These are 4-7/16" in length. I drilled 2 holes in either end. Took 14 gage wire and wrapped it around this rod (I think this might be too large. Try a smaller gage wire. The problem I had was that when I put the coil wrapped rod against the main body, the wooden rod itself stuck out away from the body just a bit too far. Thats why I suggest a smaller gage wire). Cut the wire so that the end of each wire can fit into each hole on the rod. Remove the wire from the rod. Paint the rod red. Paint the wire silver or whatever color you are going to paint the gun. Do this 3 more times. |
|
|
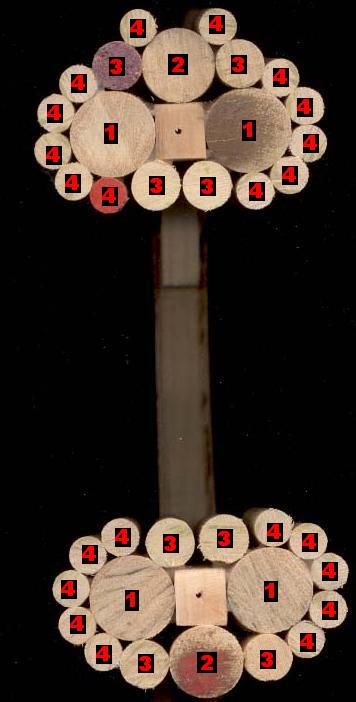
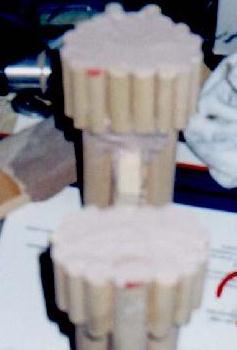
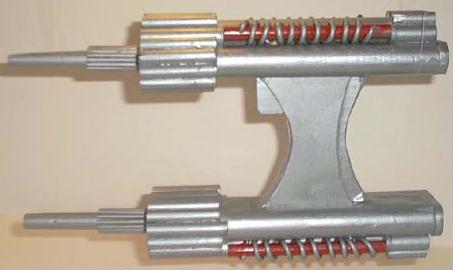
This part gets complicated. The small dowel rods. Since the rods are different sizes,
This would take forever to explain. Look at the numbered reference pics and determine your own method.
You can see a larger version of the front diagram by clicking on it. This will give you an idea on how
I did mine. I will get a larger back image soon. Here is the size breakdown: |
|
|
Just start glueing rods into place. I started on the outside and alternated sides as I went. Use the reference pics as well. There is a rod, on the side, that is a bit longer. Use the 2-1/8" length rods for these. Use a rubber band to hold the rods into place. |
|
None |
Do the same for the back side. Make sure when you are making the cuts for the rods at the rear of the gun, that you take into account the length of the power rods. They must fit between the front and back rods. Take the length of the front rods and the length of the power rods and subtract that from the total length of the gun. That is how long the back ended rods should be. Use a power rod as a guide when glueing the back rods into place. Use a rubber band to hold the rods into place. |
|
|
I placed the bottom of the gun against a piece of 0.25" wood. Trace the outline of the bottom against it. Cut it out and glue it to bottom as end cap(see pic). If you look at the reference pics you can see a "Y" shapped piece above the caps. This was too small and precise to make with tools I have, so I scrapped it. Sue me! :) |
|
|
Fill in the main body top and bottom body areas with bondo. Let dry and sand smooth. This makes the main body look like it all one piece. |
|
|
I filled in the front facing areas with bondo. Let dry and sand smooth. This makes a smooth front that fills in all the cracks and holes from the dowels. |
|
|
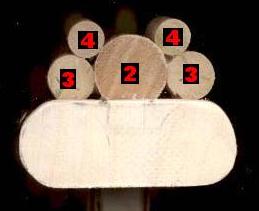
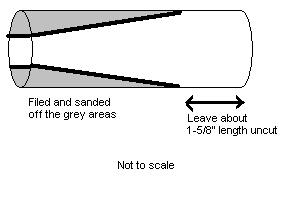
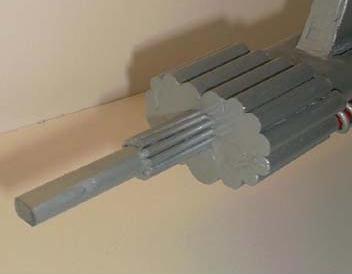
Took two 3.5" sections of 1/2" dowel to make the barrels. Draw lines on one end and on body to determin slope of barrel. I placed it in a vice so that only part I wanted sanded off was exposed above the grips of the vice. Sanded the parts off with a metal file on both sides. Repeat for other barrel. |
|
|
I took two 1/8" dowels and cut them into 1.5" lengths. Glue them around the end of the barrel. There should be about 13 or so. Do this twice. Use a rubber band to hold them in place. |
|
No pic available |
Drill a hole into the back end of the barrel that would fit the same size metal threaded rod that I used for the body. Drill another hole in the main body to accept the rod. |
|
|
Cut two pieces of threaded rod to fit the barrel assembly and the gun. Superglued (epoxy, whatever) the barrels into the body. let dry. |
|
No pic available |
Paint the body with primer (2 coats) |
|
No pic available |
Paint the body with rustoleum mettallic silver. (2 coats) |
|
|
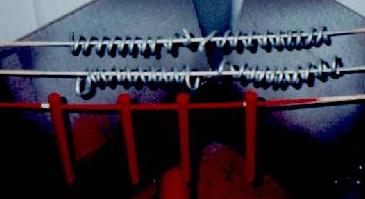
Coiled the wire around to the red power rods. The wire I used was a bit to thick.
I had to give the wire a "twist" in the back to tighten the coils |
|
No pic available |
Attach the four coiled power rods into the main body. I squeezed them in and used superglue to
keep in tight |
|
|
Spray clear coat over entire gun. (Optional) |